Application Vault
Application Vault performs the functions of a local repository and an apps management tool. The repository functionality allows you to add, update, and remove app packages. Using the management capabilities, you can view what apps were installed in Plesk, configure apps, or make them unavailable for installation. In addition, you can delete temporary installation files by clearing the Vault cache. Next in this section, you will find detailed instructions on performing these operations.
Application Vault is available in the Server Administration Panel: Server Management > Tools & Settings > Application Vault.

Adding Your Apps to Plesk
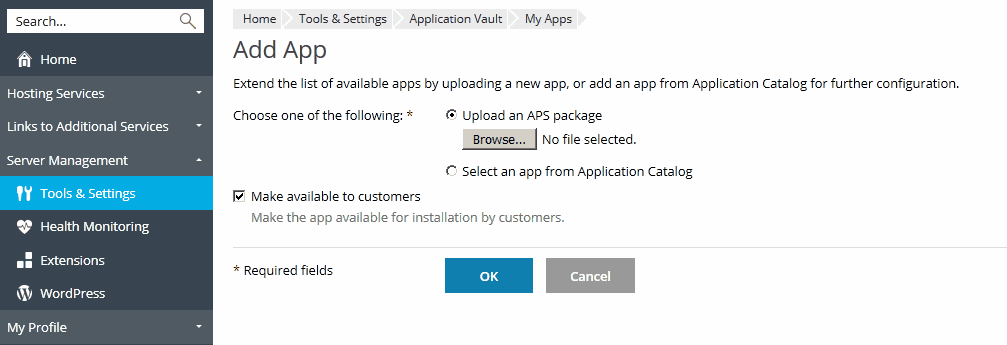
If you have a web app that you want to offer to your customers in addition to Catalog apps, you should add it to the Application Vault. Note that you can only upload apps packaged in the APS format.
To upload your app, use Tools & Settings > Application Vault > My Apps > Add App. After you upload the app, it will appear in the Customer Panel of all customers.

Configuring Server-Wide Settings of Apps
In some cases, apps from the Catalog require server-wide configuration before customers can install them. For example, if an app installation affects some Plesk services, it may require an administrator password. When your customers attempt to install such an app, they are asked to contact their provider (you) to perform the configuration. After you configure the settings, customers can install the app on their websites.
Generally, server-wide settings of an app are the settings that apply to all app installations and they cannot be changed by customers. For example, customers cannot install the ePages e-commerce app until you define how customers should access the app, either by HTTP or HTTPS.
To configure server-wide settings, complete these two steps:
- Add the Catalog app by using Tools & Settings > Application Vault > My Apps > Add App.
- Select the app from the list in the My Apps tab and submit the settings.
Managing Apps Availability to Customers
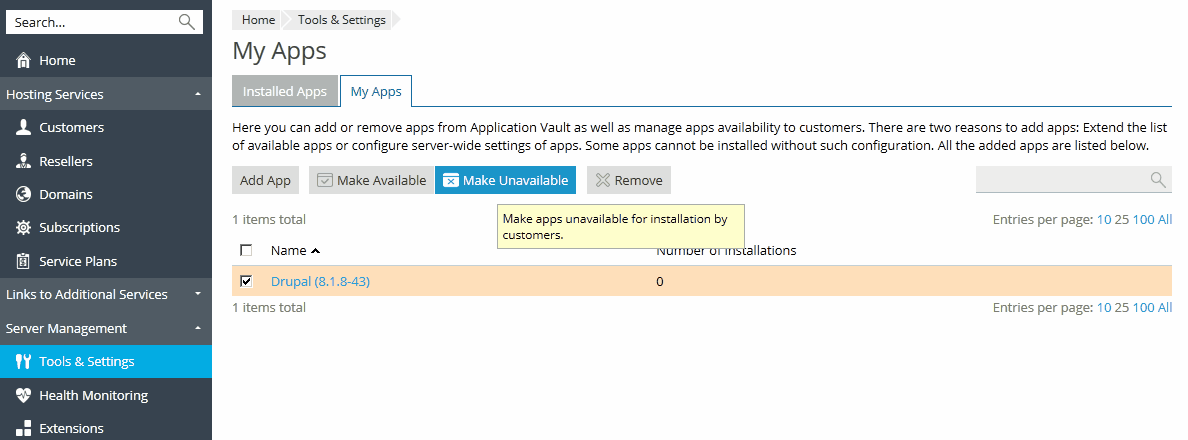
After an APS package is uploaded to the Vault, you can manage its availability to customers. This can be useful when you want to temporarily hide your app from all customers. In that case make the app unavailable in the Tools & Settings > Application Vault > My Apps tab. The app will disappear from the list of available apps of all customers. To return the app to the list, make it available in the My Apps tab. Note that you cannot perform these operations on apps you downloaded from the Catalog.

Removing App Packages
You can only remove packages stored in the Vault. If you remove an app from the Tools & Settings > Application Vault > My Apps tab, the Vault will delete the app package.
This operation does not affect app installations. Installed apps can be removed only by particular customers (installation owners) from their Customer Panel.
Tracking App Installations
In general, customers install apps directly from the Application Catalog, bypassing the local repository. The only exceptions are apps that you have added to the Vault. Nevertheless, all app installations are registered in the Vault. You can view the details on the installations in the Tools & Settings > Application Vault > Installed Apps tab. A zero number of app installations in the list means that the app package is stored in the Vault but is has not been installed by any customers.
Updating Installed Apps
The Application Vault allows updating of any app installed in Plesk to the latest version available in the Catalog. There are two main scenarios of updating apps in Plesk: either when a certain app installation is updated by you or by your customer (installation owner). You can check for app updates by clicking the app name in the Tools & Settings > Application Vault > Installed Apps tab. If an update is available, you can apply it by clicking the link Updates are available. To learn how customers can update their app, refer to the section Updating Apps.
Forced Apps Updating
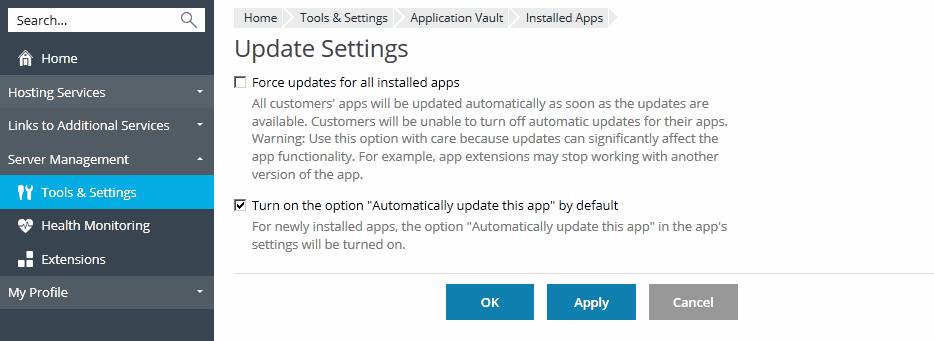
You can force automatic updating of all installed apps in Plesk. In this case, Plesk will automatically update all app instances once updates are available.

To turn on forced automatic updates:
- Go to Tools & Settings > Application Vault > Installed Apps > Update Settings page.
- Select the option Force updates for all installed apps.
We recommend that you use this option only if you are sure that this will not affect the functionality of websites. This may happen, for example, if your customers use app extensions: An extension developed for a certain app version may be incompatible with newer versions.
Note: If you force app updates, your customers will be unable to turn off automatic app updating as described in the section Updating Apps.
Clearing the Application Vault Cache
After customers install an app from Application Catalog, the app package is stored in a temporary directory on the server, the Vault cache. The files in the cache can speed up further app installations, but you can delete these files to free disk space on your server.
To delete temporary files from the Application Vault cache, use the Tools & Settings > Application Vault > Installed Apps tab > Clear Cache.
Troubleshooting App Installations
When an app cannot be installed on a customer’s website due to some reason, the customer gets an error message with the recommendation to contact their hosting provider (you). The error message also contains a brief error description that should help you find the reason of an issue.
The most common issue that may occur during an app installation is when PHP does not meet the app requirements:
- PHP version is not supported. To resolve the issue, install the required PHP version. For details, refer to Installing PHP.
-
The required PHP extension is disabled.
To resolve the issue, enable the required extension:
- To enable the extension globally for a certain PHP version, go to
Tools & Settings > PHP Settings and click the name of any of
the PHP version + handler type combinations using the desired PHP
version. You can either select the required extension from the
list, or go to the php.ini tab and add the corresponding PHP
directive to the server-wide
php.inifile. - To enable the extension for a specific domain, add a PHP directive to the domain’s PHP configuration. Learn how to do this in the section PHP Settings.
- To enable the extension globally for a certain PHP version, go to
Tools & Settings > PHP Settings and click the name of any of
the PHP version + handler type combinations using the desired PHP
version. You can either select the required extension from the
list, or go to the php.ini tab and add the corresponding PHP
directive to the server-wide
After you add the directive, restart the web server. For details, refer to System Services .